Thursday 21 July 2011

Guest Blog: Featuring the artwork of Loose-legs Lawson.


My sister Tricky has asked me to be a guest on her blog this week.  I don’t have a cool nickname like ‘Tricky Hickson’ so… call me… Easy Lawson. No that won’t work…

Anyway, I’m going to show you step-by-step how to paint a portrait using soft pastels.

To create this magnificent piece of art that will hang in your parent’s hallway proudly, and for which you will most likely only get paid in the form of a sushi lunch with your mum, you will need;

Conte Paris Pastel Pencils
Art Spectrum Soft Pastels
Faber Castel Sketching Pencils
Eraser
Photo for reference (unless ridiculously talented you can do it from memory only)


I chose to draw our beloved Daschund Neuman. Although he’s no longer with us, this drawing captures him perfectly and pays homage to adventurous life he led. It might be creepy if you painted my dog so feel free to paint your own beloved pet, family member or celebrity crush. Or you could combine two of those things and paint Robert Cattinson:


First start off by sketching a pretty detailed outline of your subject. This is by far the most important stage and can make or break your final piece if you don’t spend enough time perfecting it. So don’t fuck it up!


Once that’s done, you can begin colouring with the pastels. Pastels are essentially like chalk but they can be smudged and blended to create a smoother finish. I like to start with the eye area because it really brings the subject to life. (Unfortunately, not literally. RIP). The most important part of the eye is the pupil and the reflected light which can be achieved by a quick swipe of pure white over the pupil.  It gives the eye more dimension. If the dog you’re painting is also black, or your painting a person with black hair, make sure to not just use straight black. Mix in some blues, tans, yellows, browns and skin tones where necessary. Keep checking back on your photo for reference.


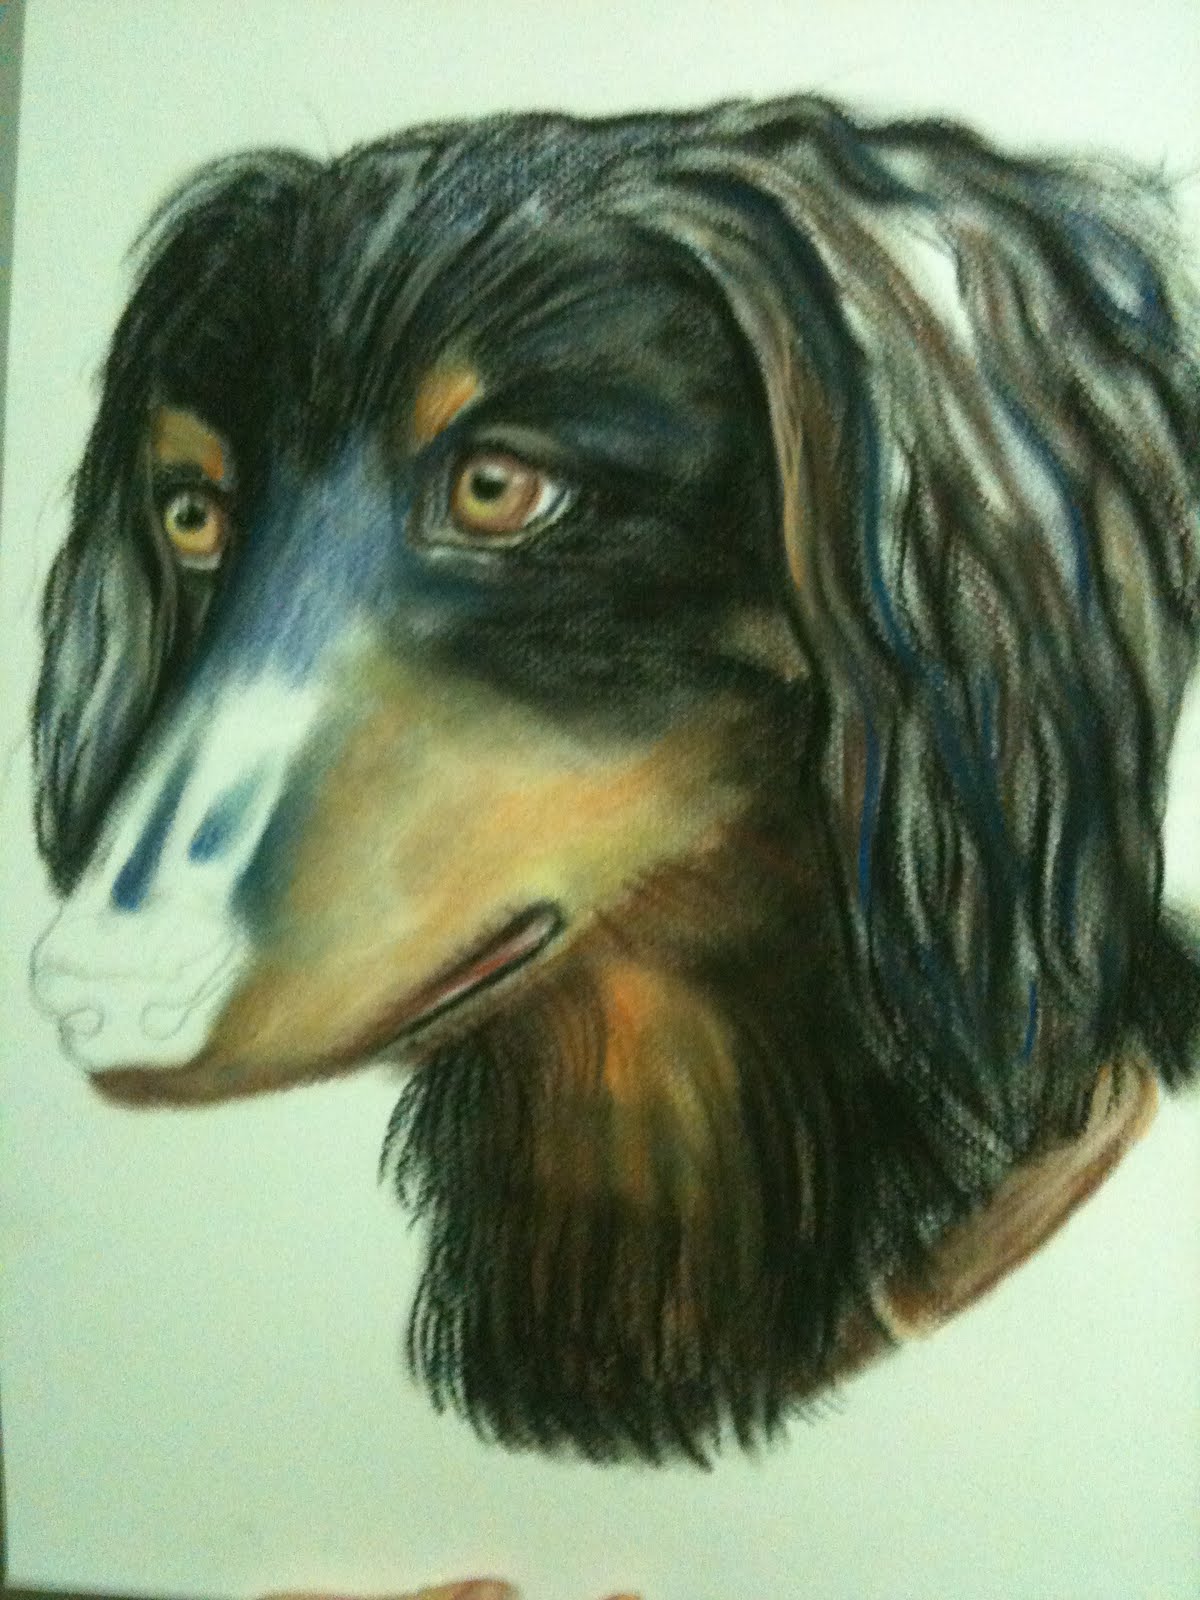
Work your way around the ears. See all the different colours in the hair that I’ve used? This also applies to painting humans. A blonde girl might have whites, yellows, creams, umbers, greys or even blacks in her hair. It would never be a straight colour. The strokes should obviously go in the same direction as the hair would. The good thing with pastels is they can be smudged and mixed on the page, and you can rarely fuck it up because you can go over the top of it as many times as you like. Good news for novices!


I’m working my way through the picture in a logical order of the direction of the hair to keep it all flowing naturally.


Almost finished. While the painting could be finished here, I like to go over them at the end with a white pastel and highlight any areas that are hit by sun or light. Also to draw in any grey hairs or whiskers or any finishing touches.


And voila! The painting is complete. And I’m very pleased with how it’s come along. Give it a decent spray with hair spray to set and it’s ready to be framed.

Here is a super close up of the eye area to show you what pastel looks like close up and how much detail goes into each piece.


My guest blog post might not have been as lol-worthy as Tricky’s normal posts but I hope you found it informative enough to go and pick up a pack of cheap pastels from Stacks and give it a go! Or not be pov and actually fork out for some proper materials from an art store. Either way, good luck my fellow artistes!

Monday 18 July 2011

This jewellery 'looks' good!

Most girls like looking at jewellery, but what a lot of people don't know is jewellery really likes looking at you too...


Enter: Eyeball Ring Thing.....

It was my friend Lauren Confos's birthday over the weekend so I decided to make her something I thought she would like. I once saw her wear a dress with eyeballs on it, so, that was pretty much what I was going by. I mean, she HAS eyeballs, so surely she likes them...

And this was really fun to make, I also made matching hairclips to add to her collection of about 1000000 hairclips...

You will need:

Large teddy bear eyes
White paint
Red texta
Brown, blue, green, yellow paints (or whatever colour you want the iris to be)
Paintbrush
Ring/hairclips
Hacksaw, or steak knife you don't mind blunting the shit out of - I went for the latter cause I'm badass
Coloured textas
Black marker
Flesh coloured material
Super glue
Scissors
Hairspray
Wine... to help with the.. sealing, of the.. glue...thing..........Fuck, I don't know.
First get the teddy bear eyes (about $4 a pack from Spotlight), about this size.... Have a drink of wine.


Then paint it white, like an eyeball. It will need a few coats, so I sat there with a hairdryer and dried each layer to speed up the process. It helps to sip your wine while you blow dry the eyeball.

Then get your main colour, ie green and paint an iris. Put lighter flecks through or use yellows or other colours to get a realistic looking iris. Once you are happy, spray it with hairspray to give it that realistic glazed look. Do this before applying texta for the detail or the texta will run. Use a red texta to draw on little red veins and the black marker for the pupil. Have a drink of wine then put a dash of white on the pupil to make it look like a reflection.  


Grab your hacksaw - aka steak knife - (probably shouldn't have had all that wine before....) and saw off the back `spike bit' of the eye. Pretty sure that's the technical term..... It helps if you have plyers handy too. Then cut out two strips of the flesh material and fold a crease to form 'eyelids' and glue them down. Try not to glue your fingers together like I did because your skin WILL peel off and it WILL hurt like a bitch. Once it's dry you can glue it on to a ring or clips as so:

You can even glue it to a bow! Wow, the possibilities! No... wait, that's pretty much it....


Don't they look pretty!


I made a few different coloured ones but here are the finished products... Stop....it's wine time!


I wore mine to the shops and totally got looks... so yeah.

xoxo Tricky

Tuesday 5 July 2011

Beerings.. beers for ya ears!

Beer + Earrings = Beerings! There's some interesting word-math for you.

If you're like me, you are constantly thinking, 'How can I show my love of beer to the world even more?' then don't fear, because now you can make your very own Beerings and hang those lagers from your lobes.

I decided to make the earrings for my mate Bridie Jabour's birthday. Cause she's part Irish and she loves beer. It was either that or earrings with the word c*nt on them, because that is one of her favourite words, especially when she gets vintage Bridie road rage.

But I thought that would be a bit crass, even for her, so I went with the beers. (Bridie also has her own blog, you can read it here - she is funny.)

But here is what the earrings turned out like:

(close to actual size)


(Now for the close-up - this was probably close to the actual size pre-shrinkage)

These are made on shrink plastic like the David Bowie necklace in one of the previous posts and took about half an hour so to do. But if Bridie is reading this, it took like hours and hours and I put in heaps of effort...

Same process as before, draw the picture you want relatively big on shrink plastic (available from Spotlight for about 15 for 6 sheets), sand the paper really well, draw and colour and punch a hole in it, then bake on a low heat in the oven on some baking paper for about 3 or so minutes or until shrunken and flat. Add earring fastenings. (see previous post for materials and more detailed technique explanation).

I didn't manage to get a picture of Bridie wearing these unfortunately, but here is a picture of her anyway.
So Irish.....


Tricky xoxo